
Instructions for configuring Google Workspace may change. For the most current information, visit the Google Workspace website.
Advanced Settings
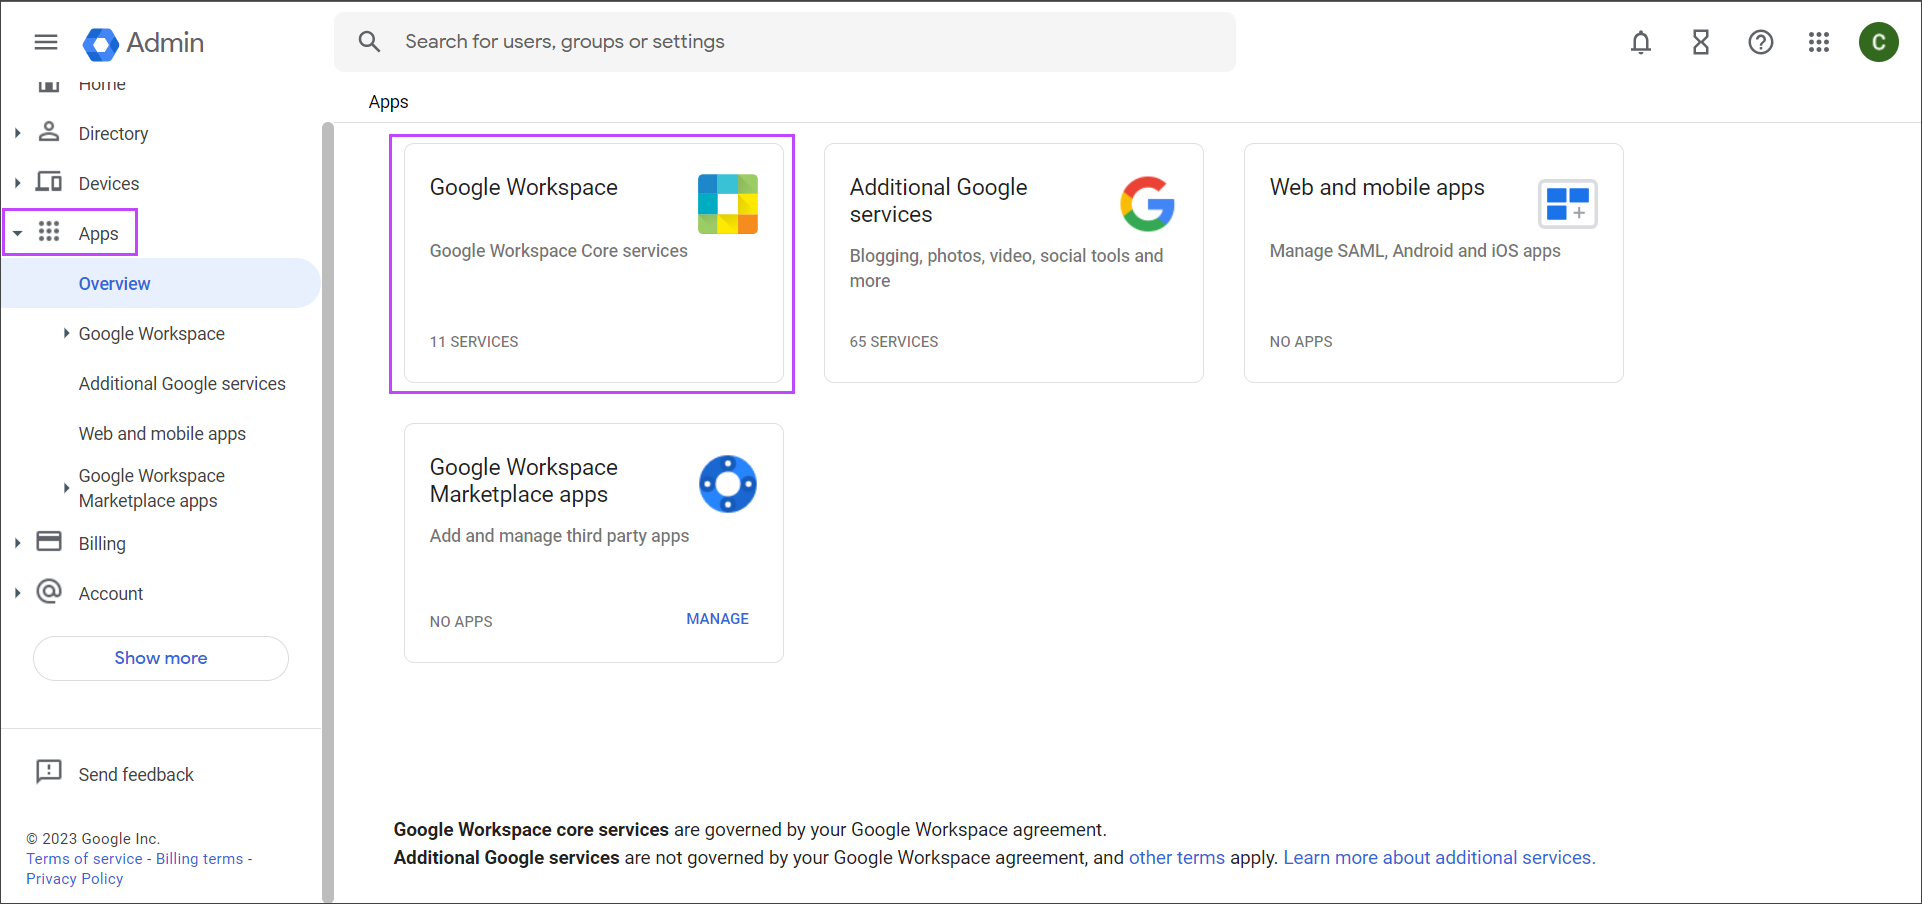
- Sign in with your Google administrator account to the Google Admin Console
- On the left, expand Apps and select Overview. Then, select Google Workspace from the tiles on the right
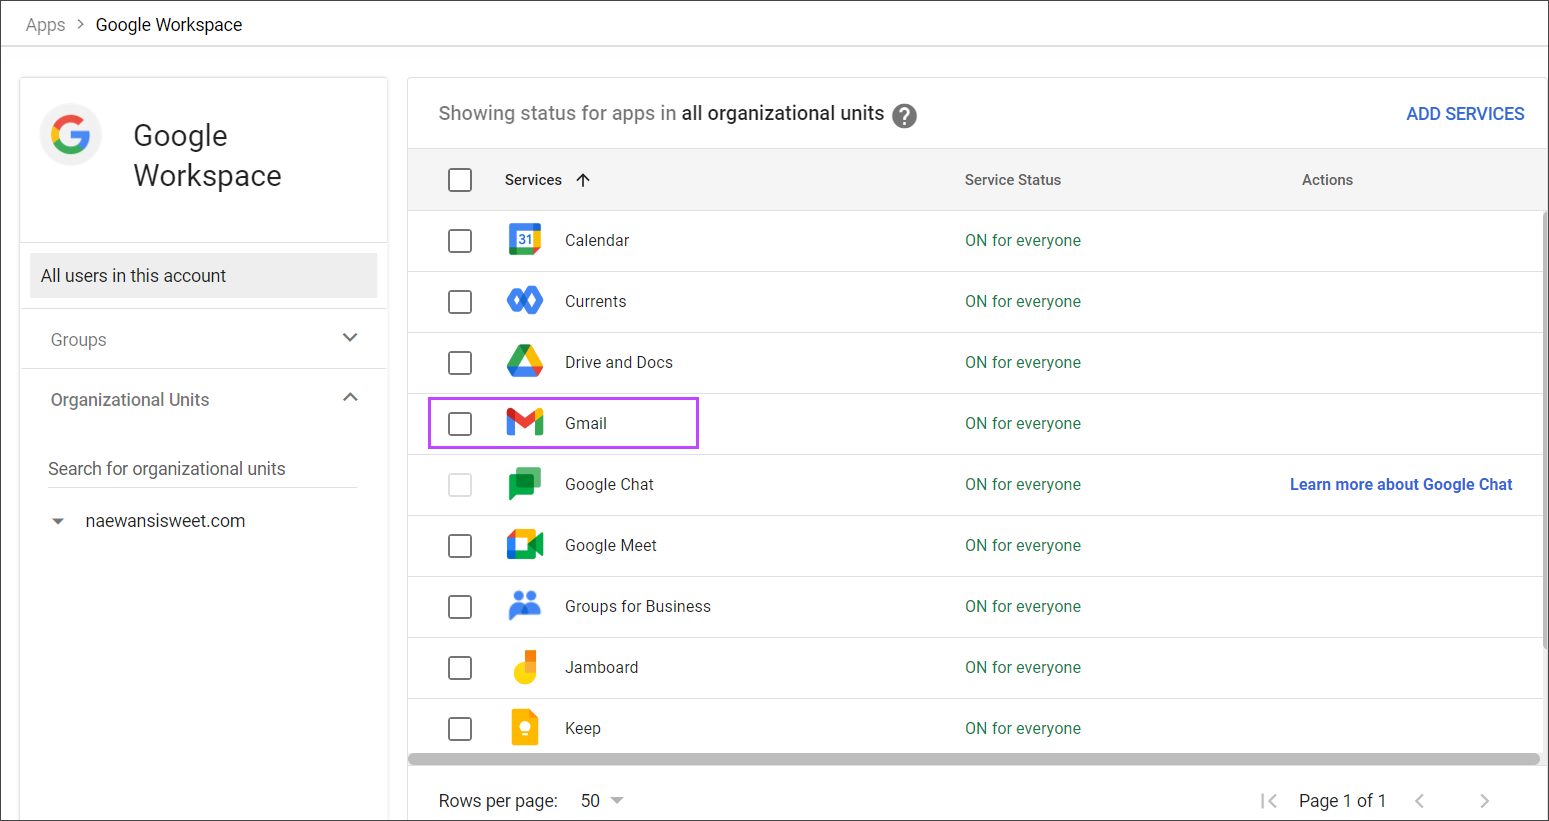
- Select Gmail
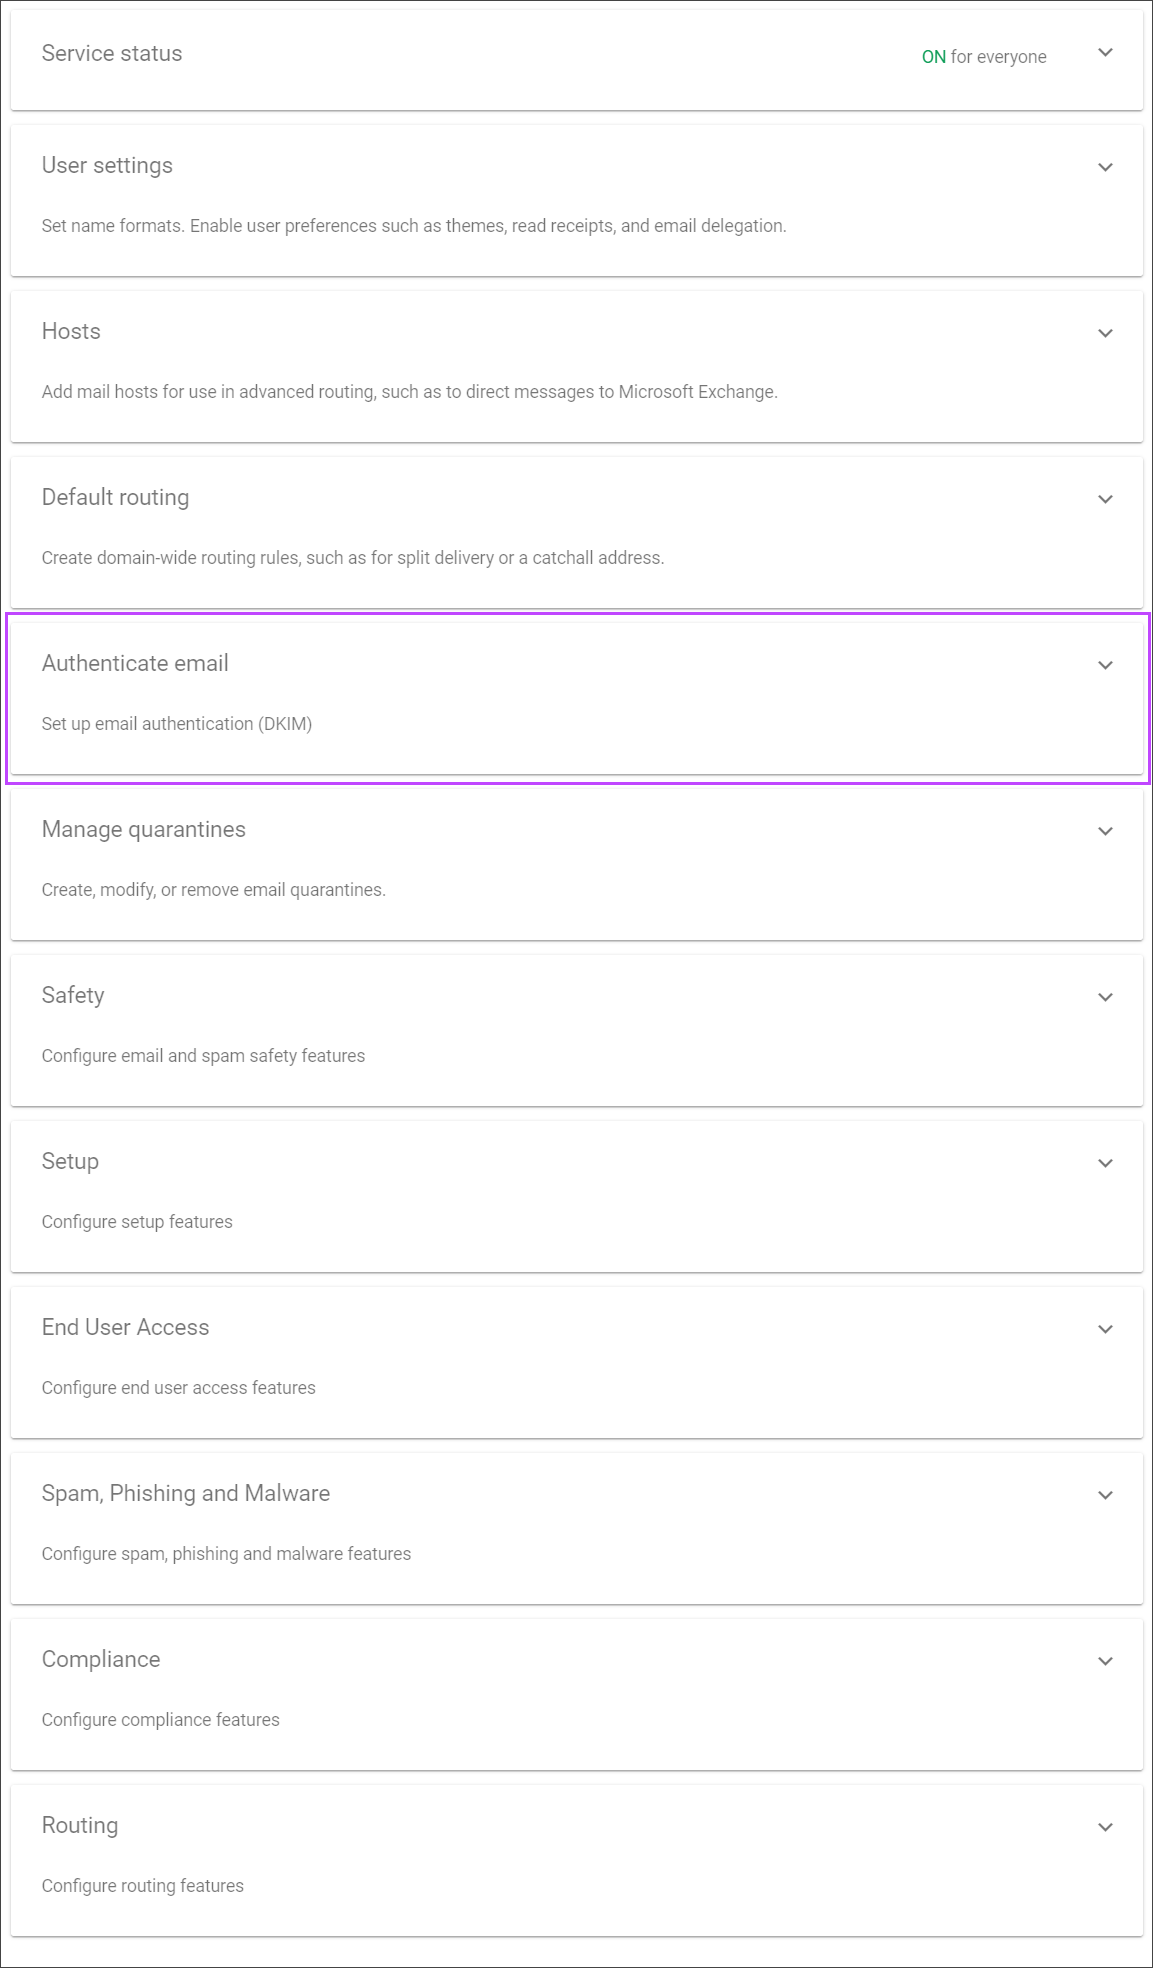
- Select Authenticate Email and disable DKIM
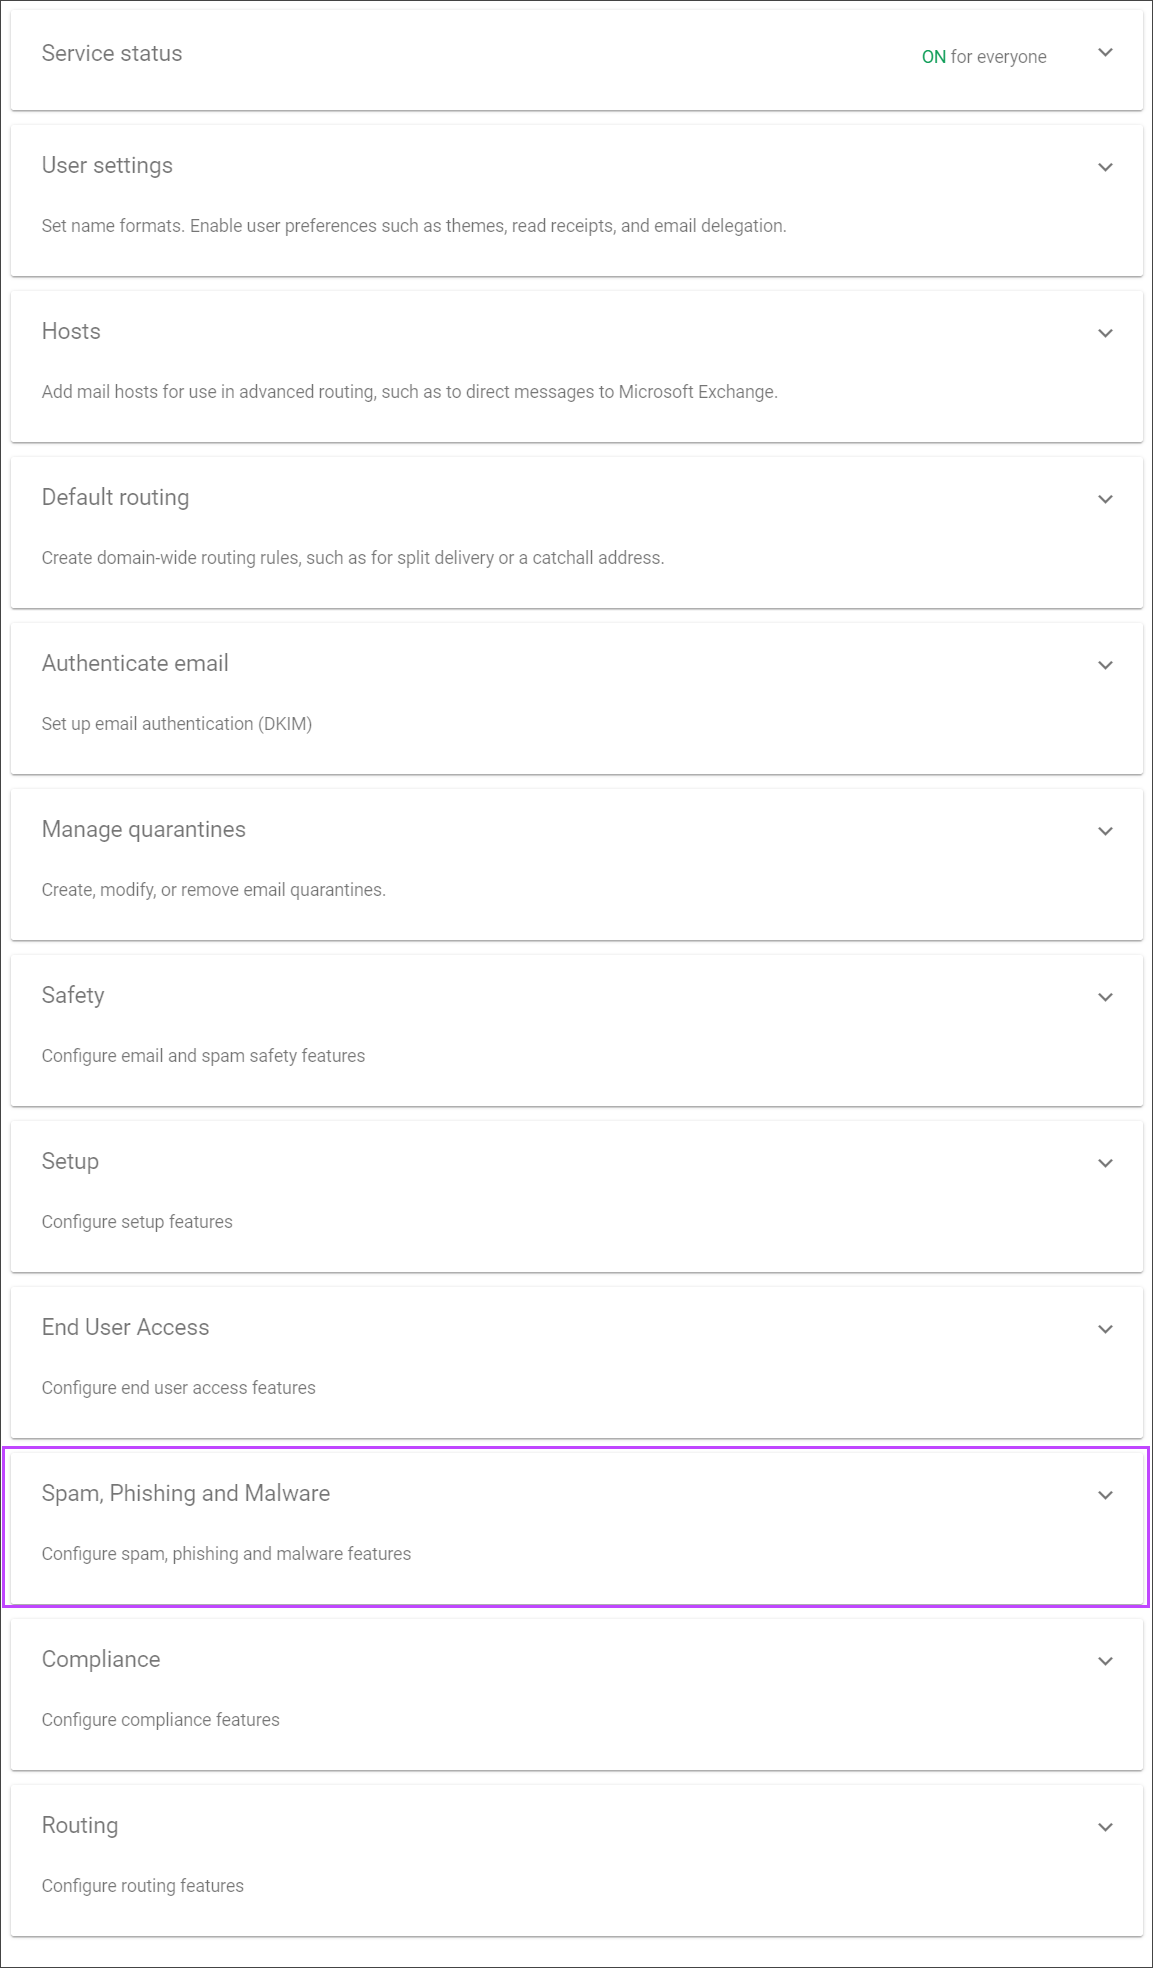
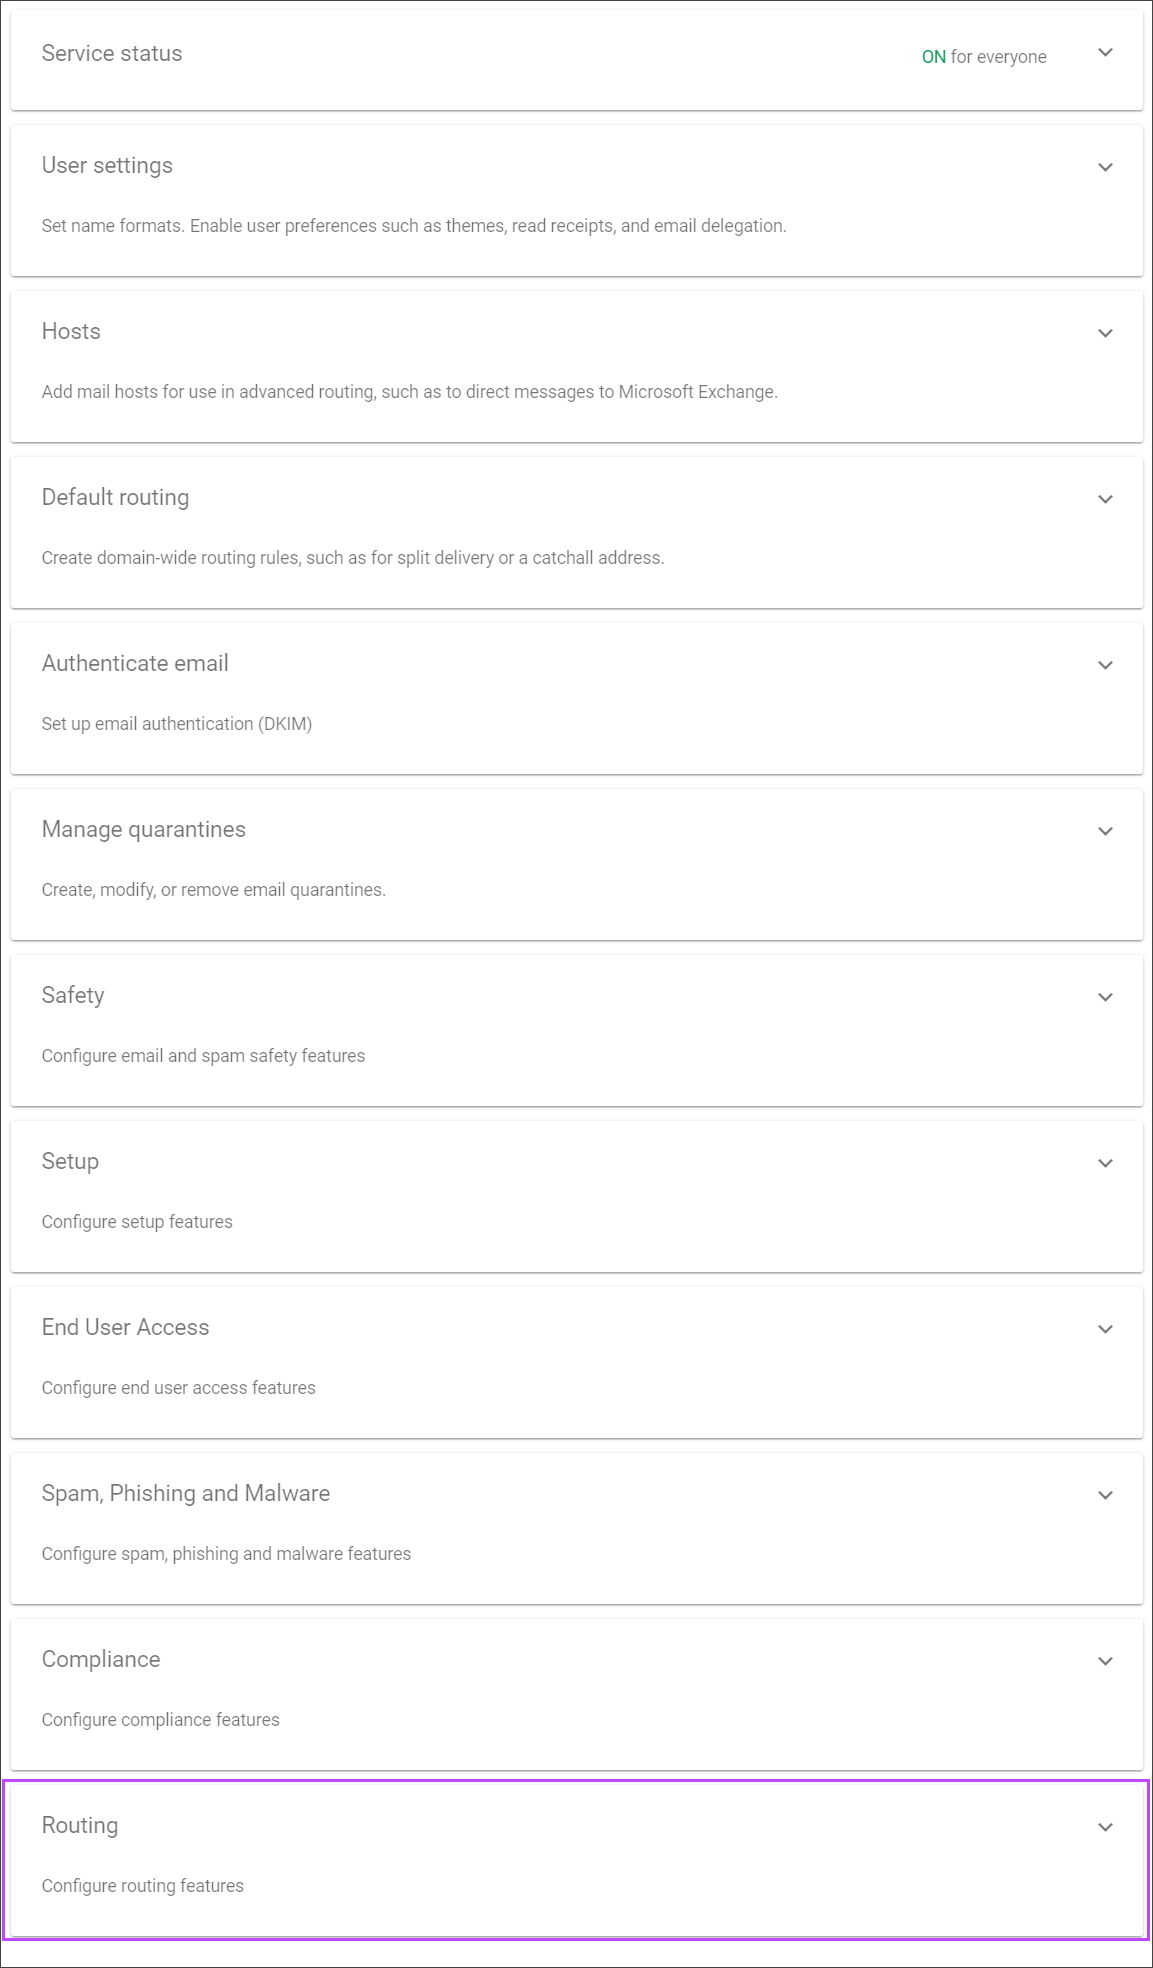
- Return to the Gmail settings and select Spam, Phishing and Malware
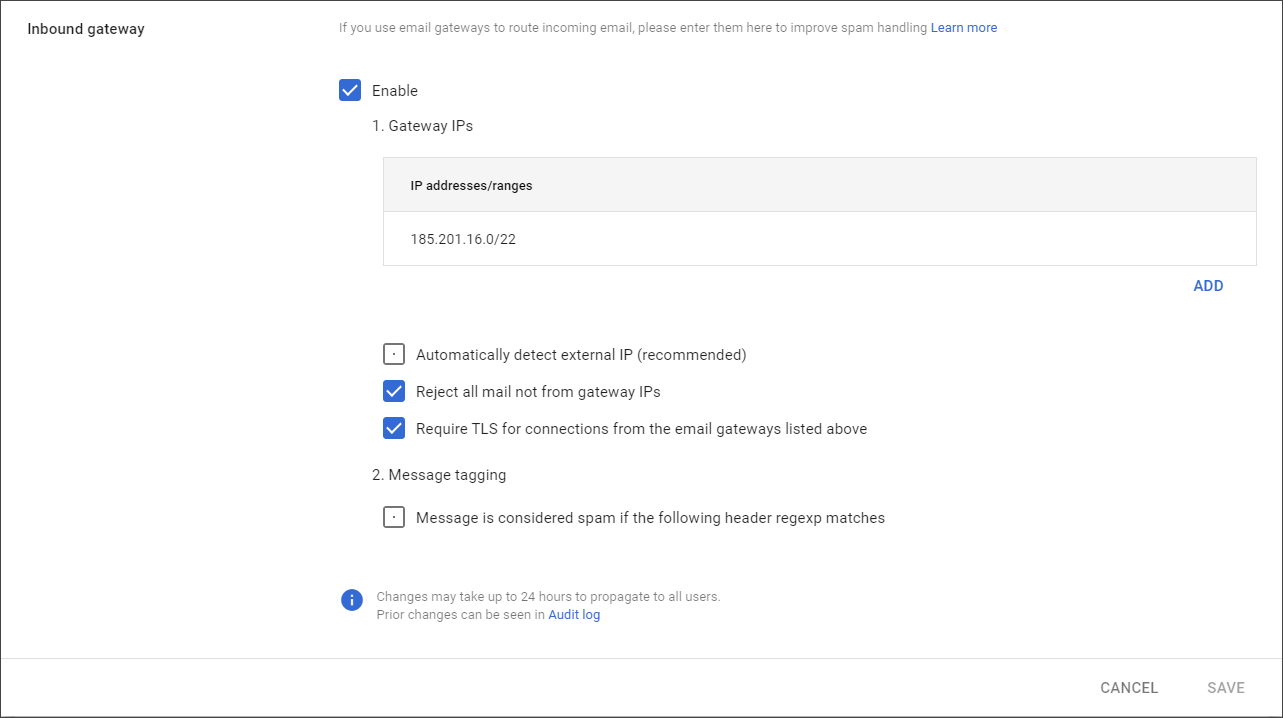
- Set up the inbound gateway using the Mail Assure Delivery IPs
Make sure both Automatically detect external IP and Reject all mail not from gateway IPs are unchecked
Reject all mail not from gateway IPs blocks messages from external senders that don’t use the specified IP addresses. If you turn on this setting, it might disrupt internal mail flow and cause delivery failures. To avoid issues with internal communication, leave this option unchecked. This ensures external filtering works as expected
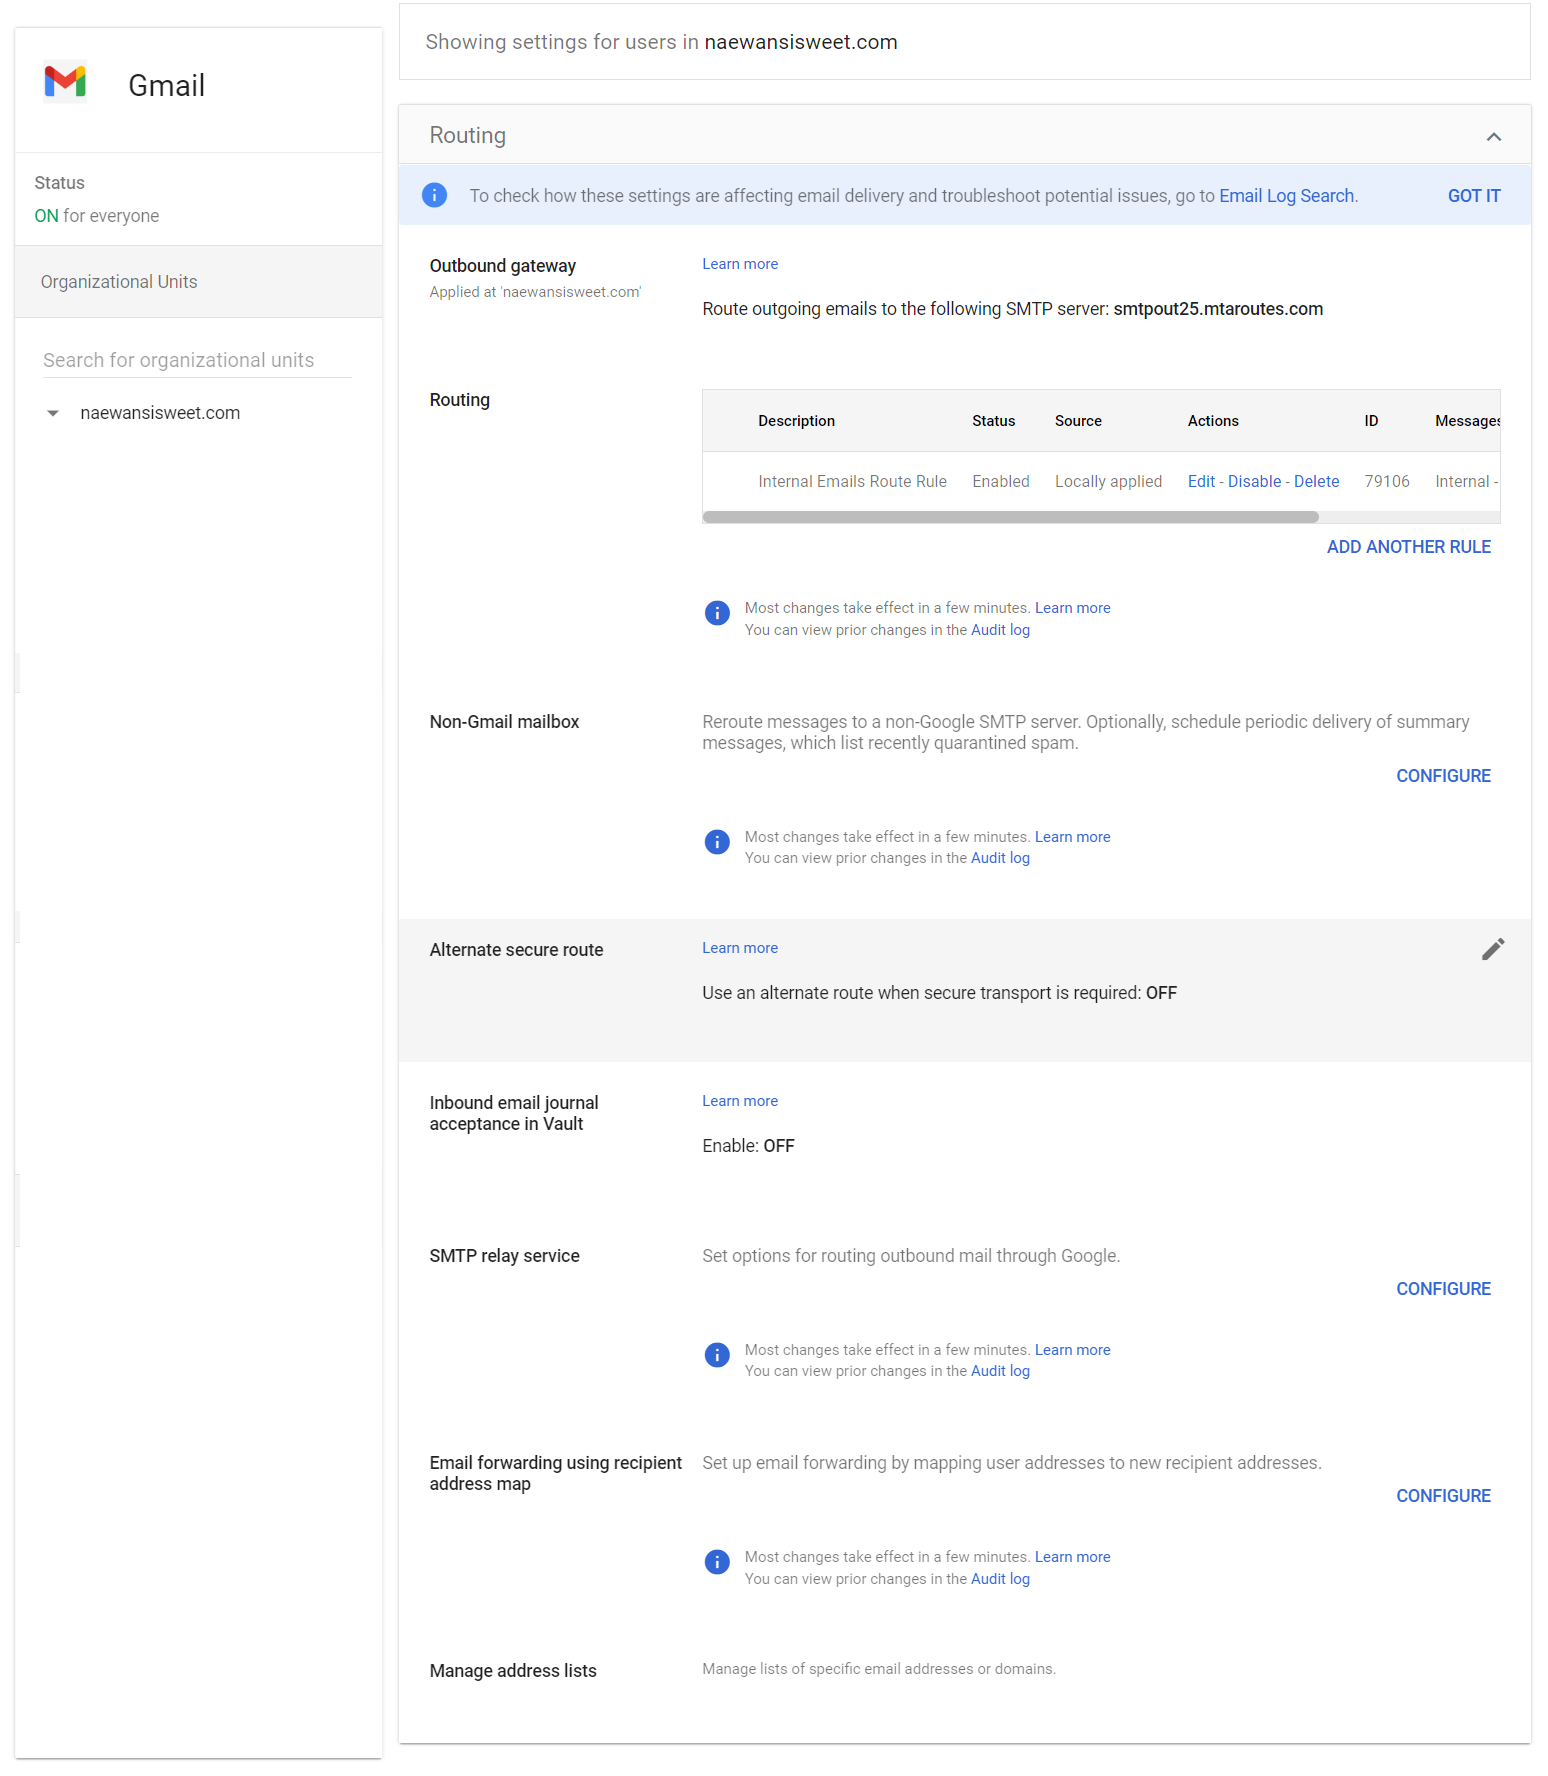
- Return to the Gmail settings and select Routing
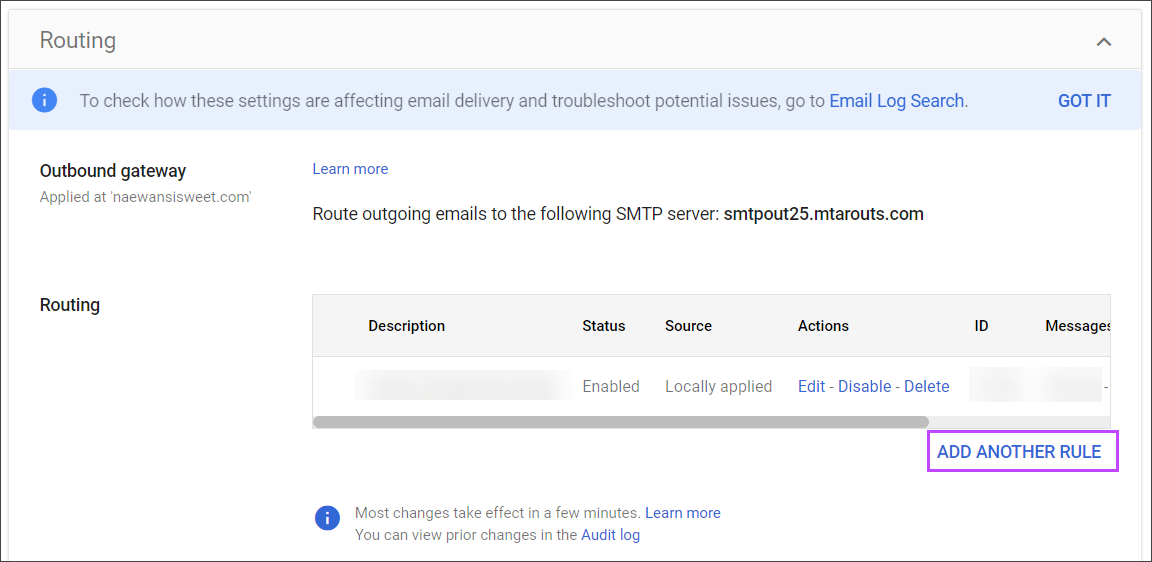
- Enter smtpout25.mtaroutes.com for the Outbound Gateway
- Select Save.

To know more about setting up an inbound gateway, visit: https://support.google.com/a/answer/60730#source-ip&zippy=%2Chow-gmail-determines-the-source-ip.
Do not use the Email Allow list, Pre-Delivery Scanning or Auto Detect External IP settings in Google Workspace. These settings conflict with Mail Assure settings and may cause mail delivery issues.
Configure Internal Email Routing
Create Routing Rule
- Sign in with your Google administrator account to the Google Admin Console
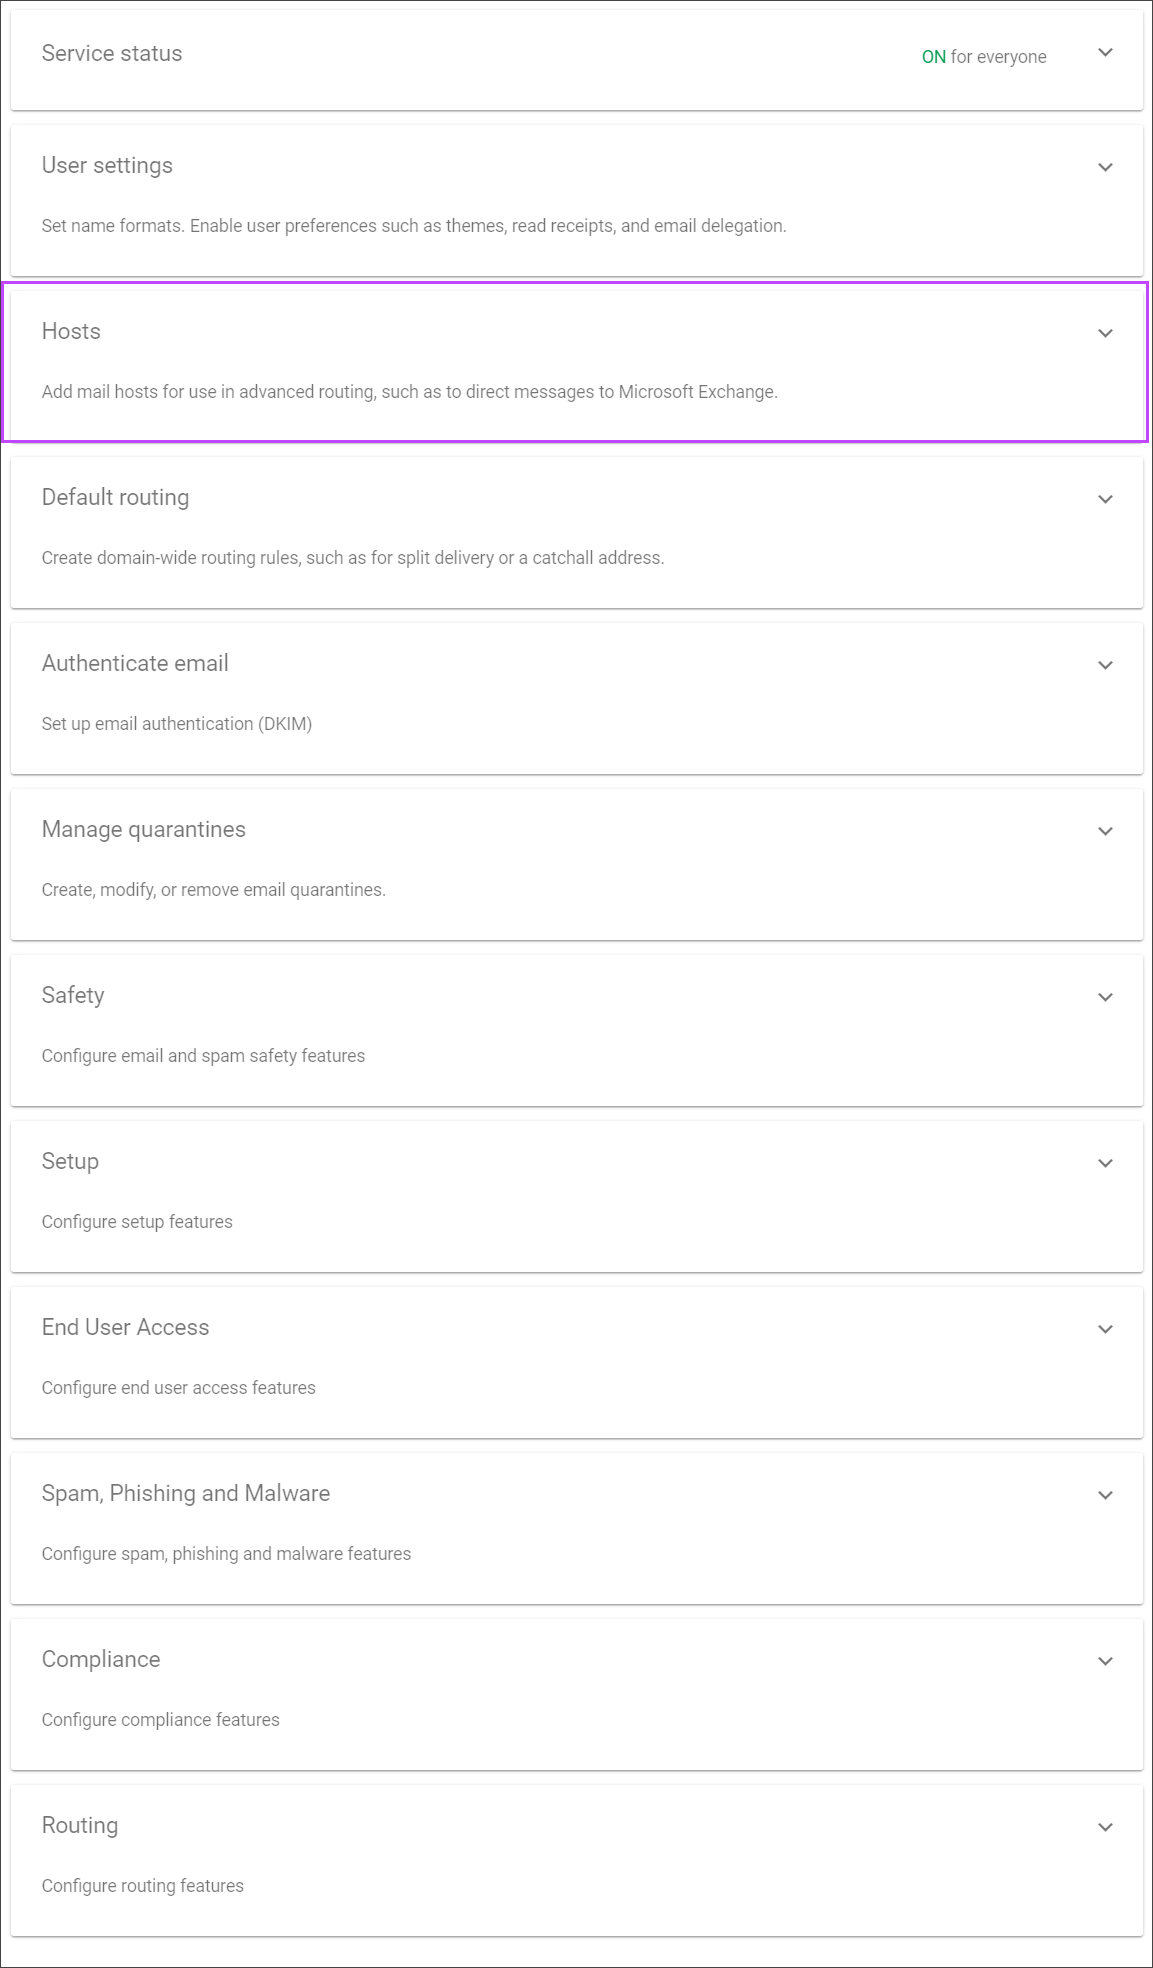
- On the left, expand Apps and then Google Workspace. Select Gmail
- Select Hosts
- Select Add Route
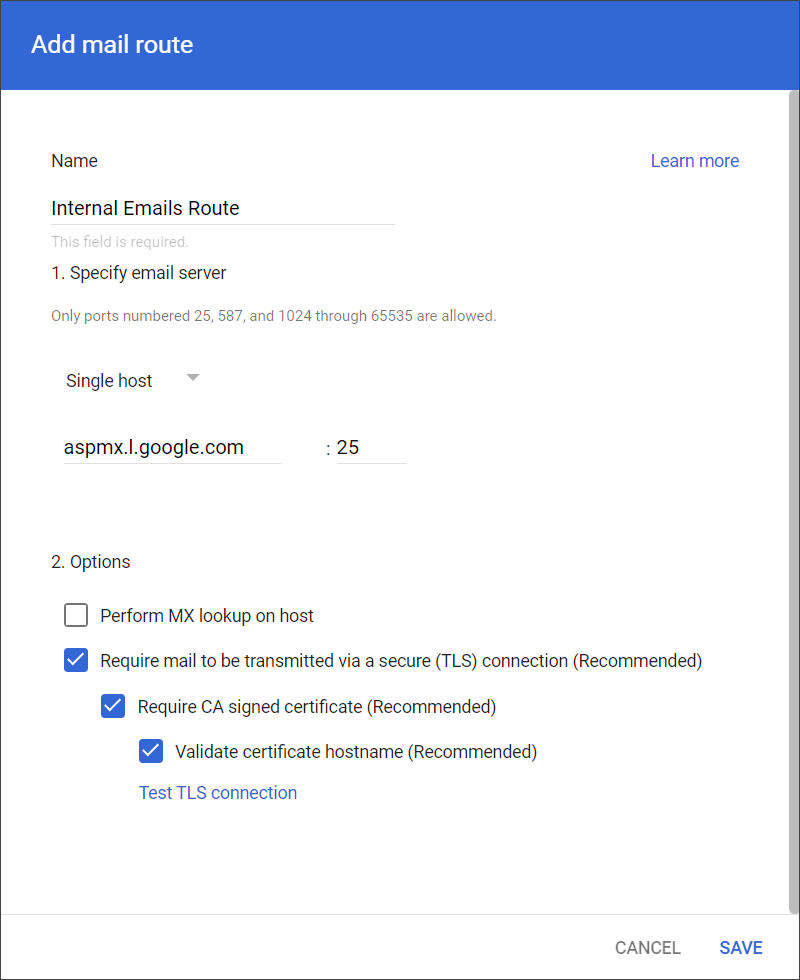
- Give the rule a clear, recognizable name, such as Internal Emails Route
- In the Specify email server field, select Single host
- Enter aspmx.l.google.com and Port 25
- Deselect Perform MX lookup on host
- Ensure the following checkboxes are selected:
- Require mail to be transmitted via a secure (TLS) connection (Recommended)
- Require CA signed certificate (Recommended)
- Validate certificate hostname (Recommended)
- Select Save.
Apply Routing Rule
- On the left, expand Apps and then Google Workspace. Select Gmail
- Select Routing
- Click Add Another Rule
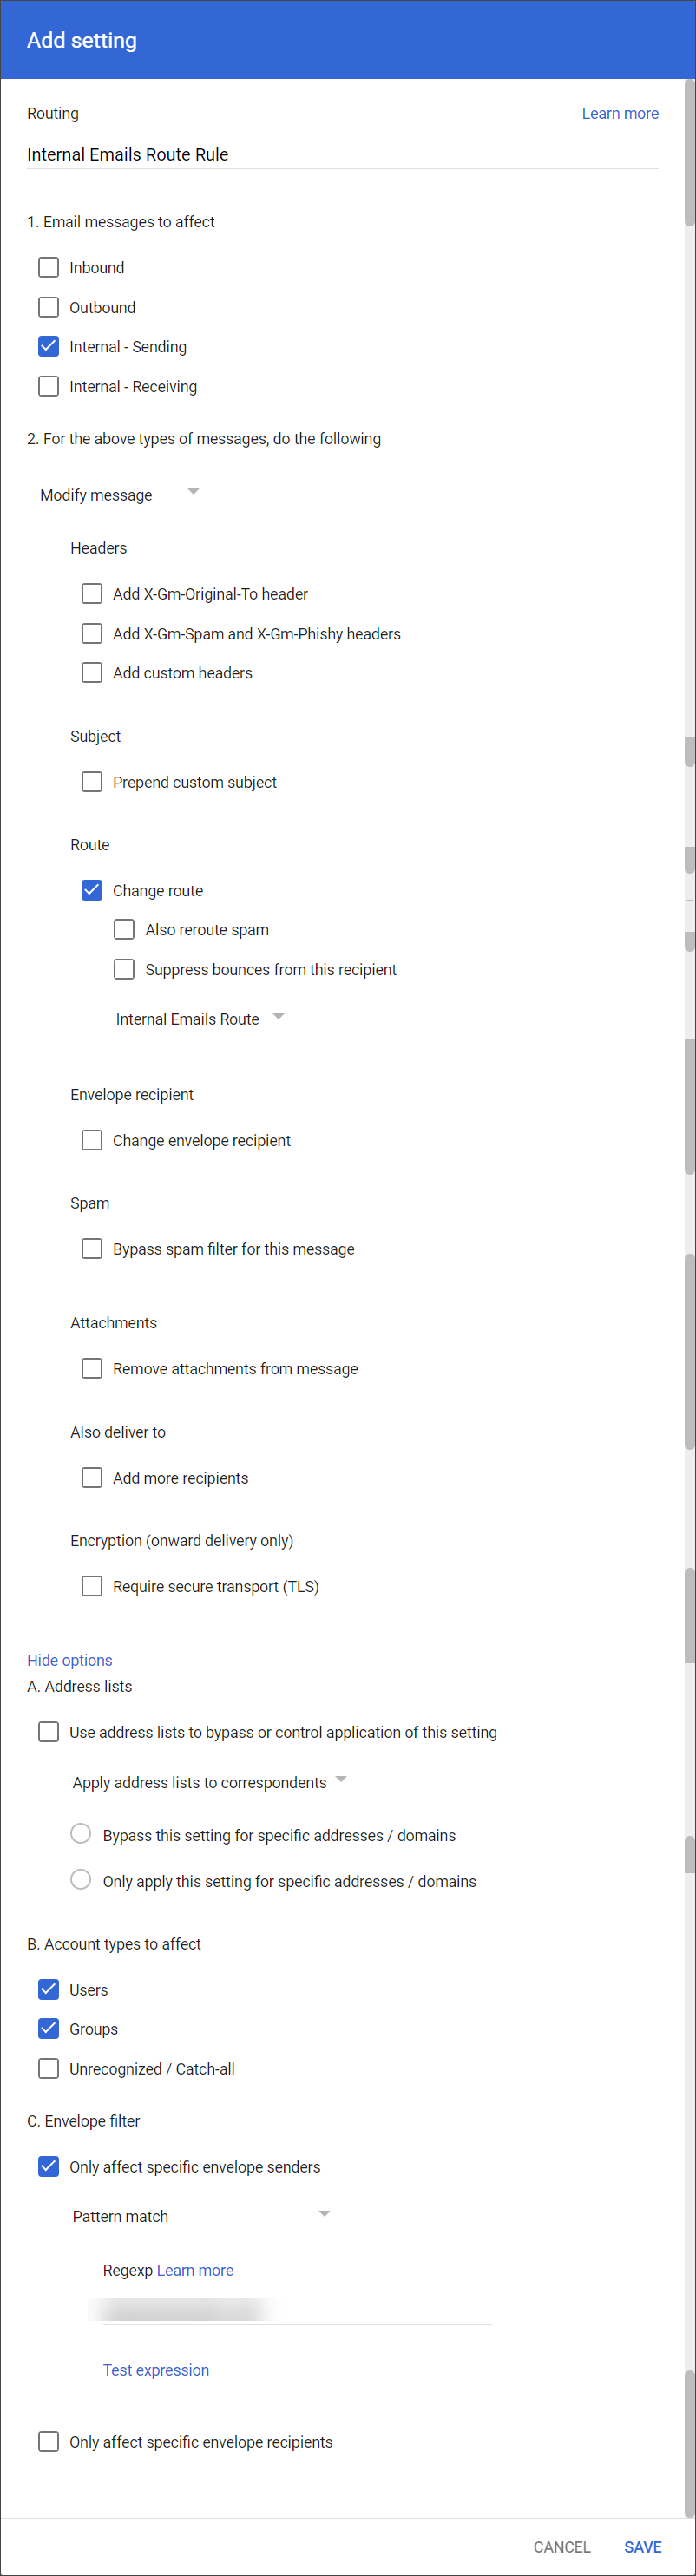
- Give the rule a clear, recognizable name, such as Internal Emails Route Rule
- Select Internal - Sending
- In Section 2, select Modify Message from the dropdown
- Select Change route and select the rule created in Create Routing Rule
- At the bottom of the window, expand Show options
- Ensure you select Users and Groups
- Under Section C, configure settings as follows:
- Select Only affect specific envelope senders
- Choose Pattern Match from the drop-down
- Enter the domain name in the Regex field i.e. my-domain.invalid
- Click Save
Disable SPF/DKIM Checks
Performing SPF and DKIM checks at this stage can cause emails to be falsely marked as spam. We recommend disabling the Google Workspace SPF and DKIM checks.
- Sign in with your Google administrator account to the Google Admin Console
- On the left, expand Apps and then Google Workspace. Select Gmail
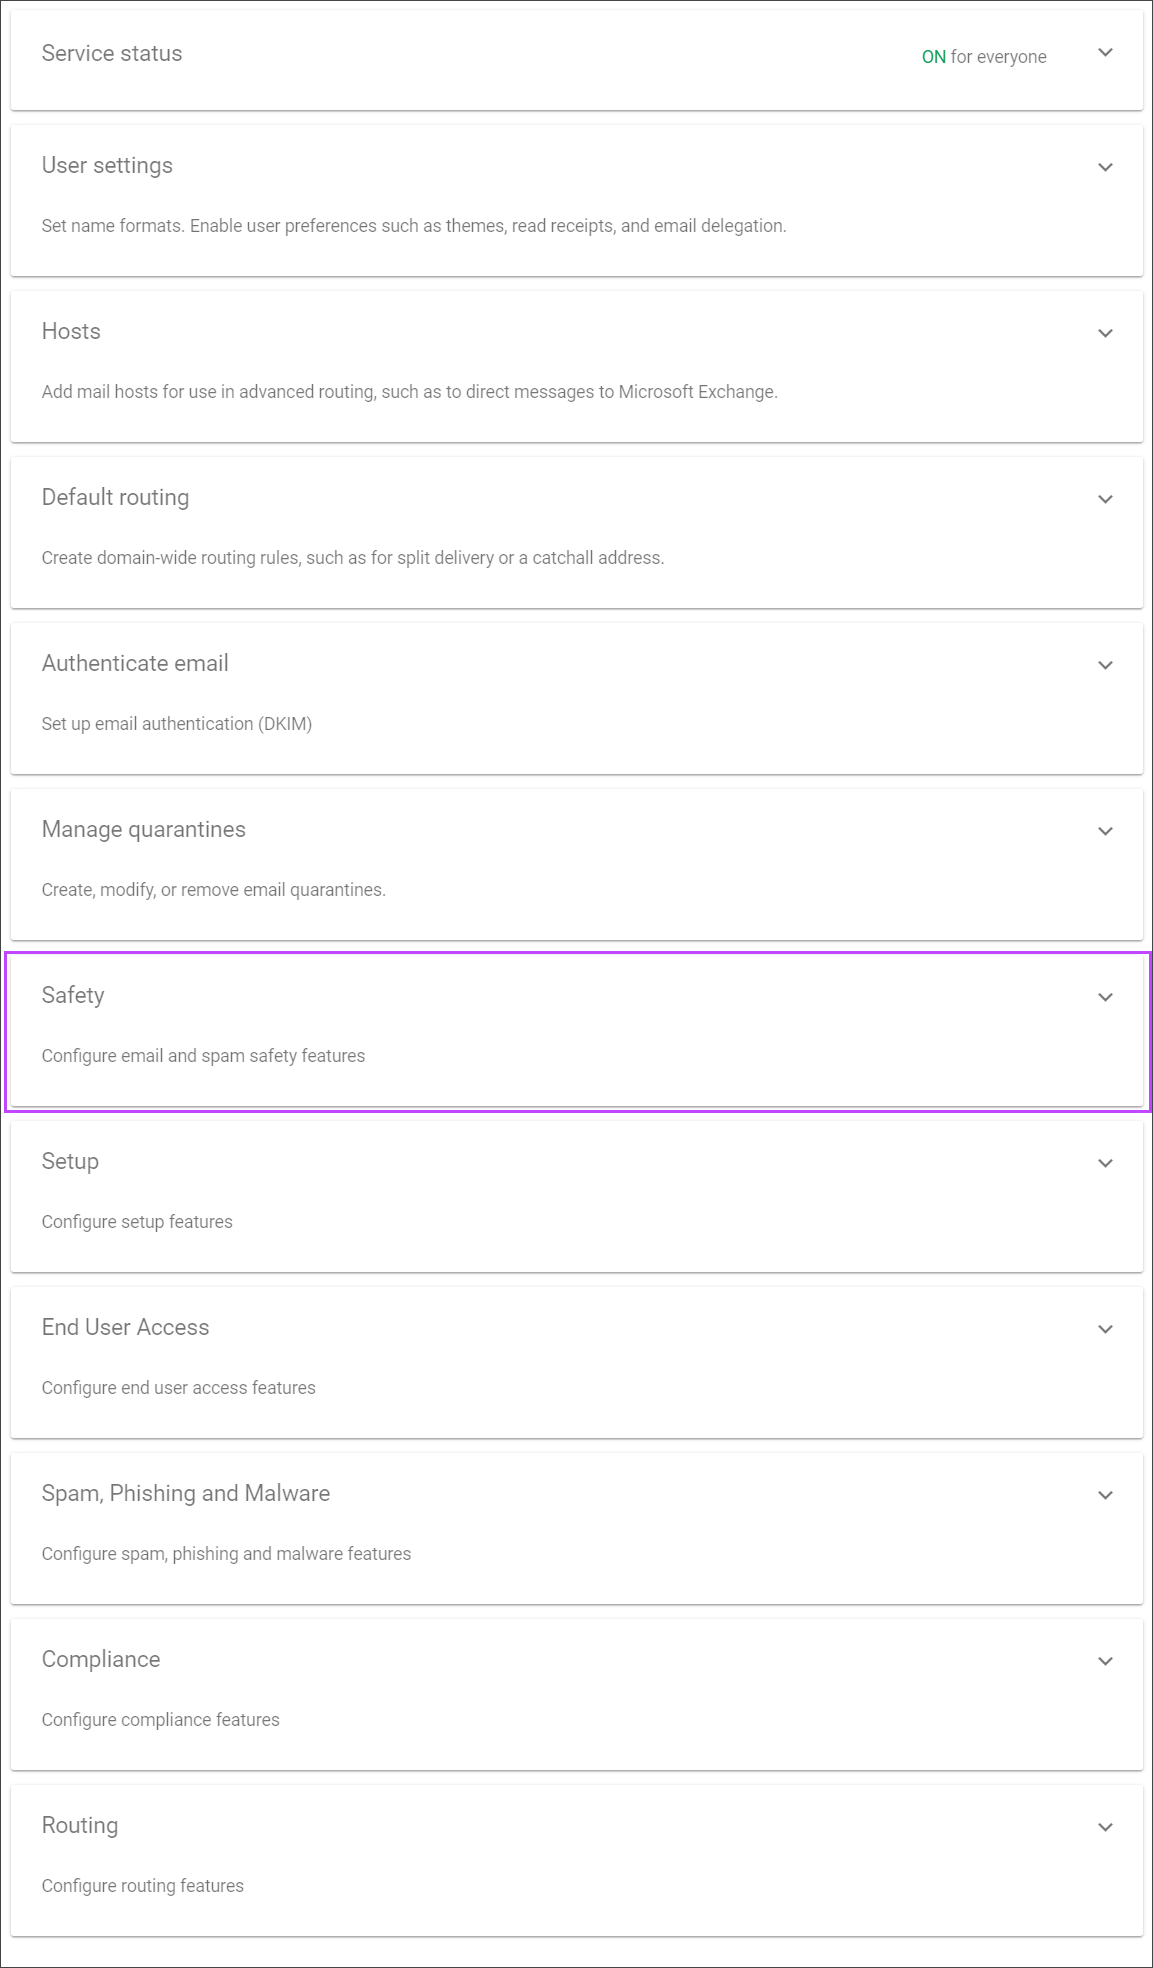
- Go to Safety
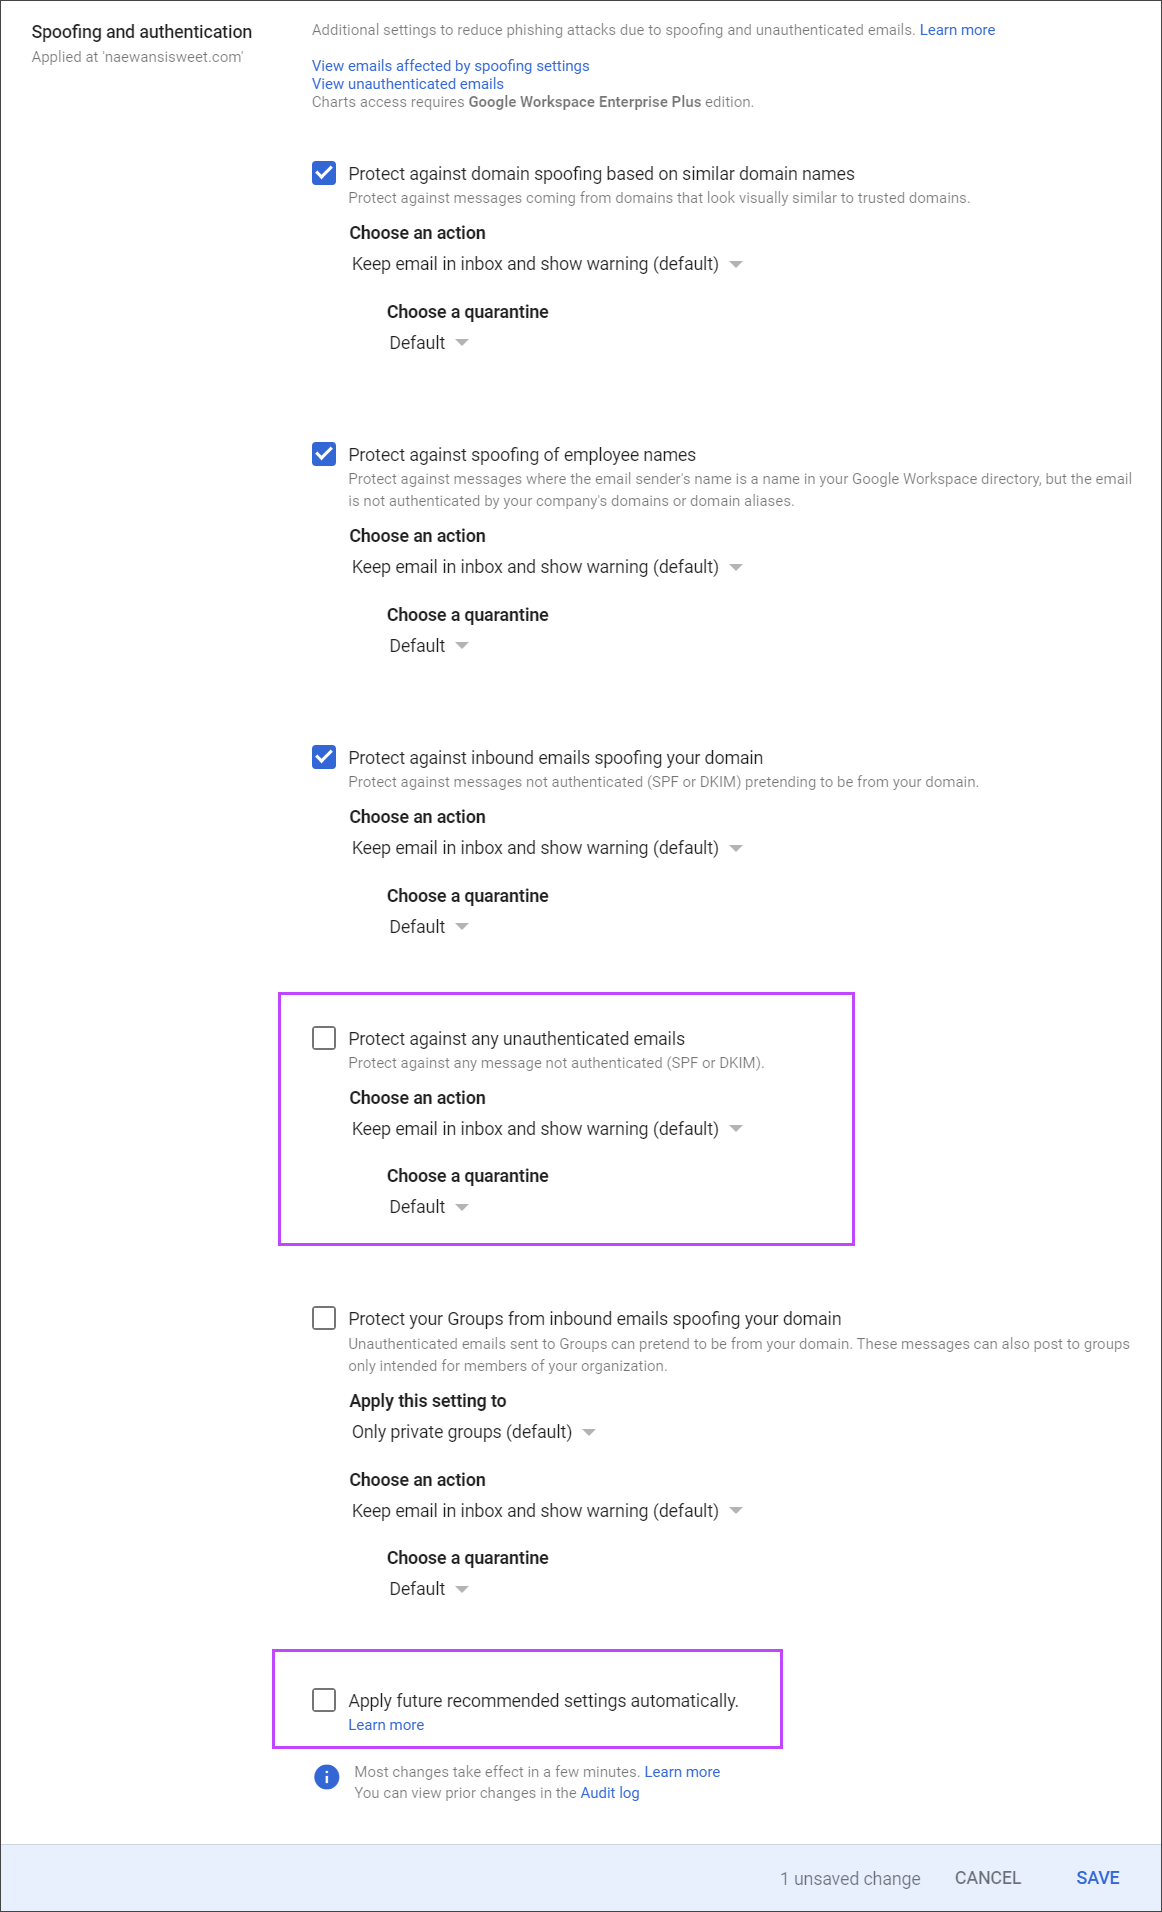
- Select Spoofing and Authentication
- Deselect Protect against any unauthenticated emails
- Deselect Apply future recommended settings automatically
- Select Save
Once the Domain is configured in Google Workspace, return to Mail Assure to Check your Domain can Communicate with the Google Workspace Mail Servers.
Disclaimer: This documentation may contain references to third party software or websites. N-able has no control over third party software or content and is not responsible for the availability, security, or operation, of any third-party software. If you decide to utilize a release involving third-party software, you do so entirely at your own risk and subject to the applicable third party’s terms and conditions of the use of such software. No information obtained by you from N-able or this documentation shall create any warranty for such software.